Manitoba Blizzard of 2017

While so many of my blogging friends are posting pictures of plants coming up in their gardens, and making plans for the new garden season, I'm sitting here looking out my window at snow and ice! 

Blowing snow, white out

I have no idea how much snow fell, because the wind blew it all into huge snowbanks, leaving other parts of the yard bare. This storm lasted over 24 hours! 


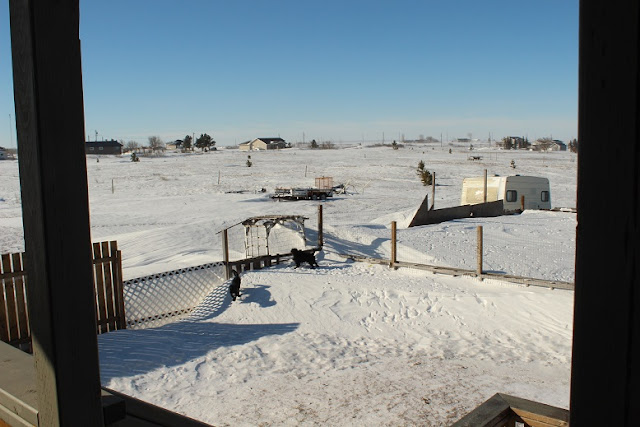
This was my view yesterday.

The view from my front door, blowing snow

There's a neighbour over there somewhere!

Blowing snow


Near one community, vehicles were stranded on the Trans Canada for up to 18 hours, after a bad accident blocked the way. Firemen and local residents eventually went out on snow mobiles to rescue them, and bring fuel. The town's school opened up their gym to about 70 people, providing food and other necessities until the storm passed. I'm sure as days go by we'll hear more stories like this.

Morning number 2....Brian tried to go to work this morning, but decided not to try to plow through the snow drifts. Later in the morning he took a walk down the road after someone else went through with a truck...they were stuck a few times, but finally made it through. It doesn't look too bad, but that snow is rock hard, and it's sheer ice underneath.....I think we'll wait for the snow plow!

Our road blocked by snow


We'll have some shoveling to do to get out the front door!


Our front door blocked by snow

Our snow covered patio and deck stairs

The view from the road to our house. The wind just blew the snow right across our driveway, so it's relatively clear, with just a few small drifts. But right in front of our garage is a different story!
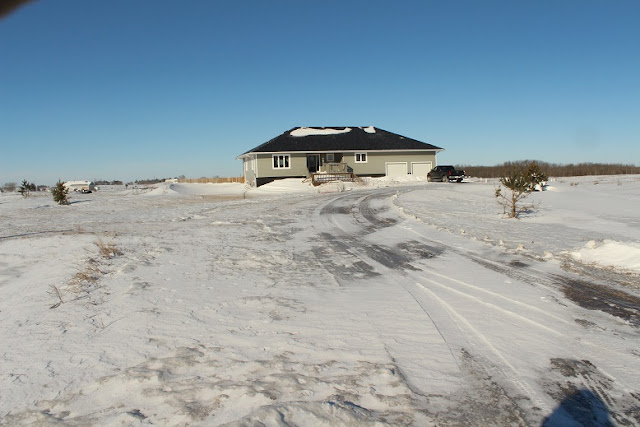
The view from the road to our house

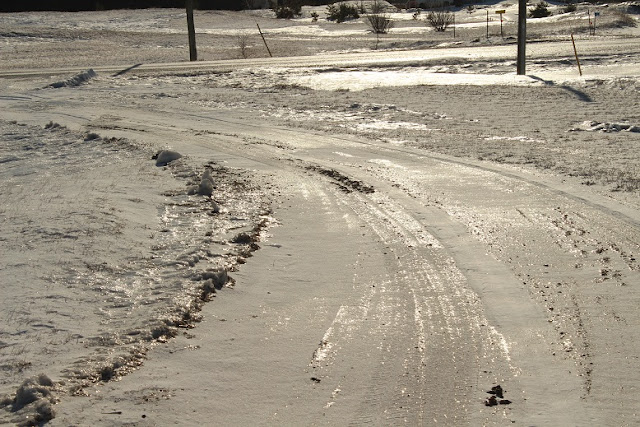
Not much snow, but lots of ice!

Ice covered driveway


The wind blew much of the snow away in some spots, leaving sparkling ice covered ripples.
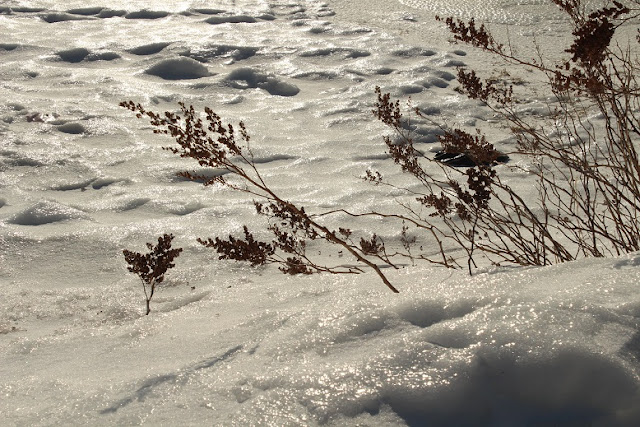
Sparkling ice on the snow drifts

Sparkling ice on the snow drifts

Ice on the deck rail

I'm glad the boys didn't make a skating rink in the back yard this year,
 because that area is now buried under 4-5 feet of snow!

Snowbanks cover the yard

UH OH! the dogs have discovered they can almost jump the fence in some places! And to think, I was looking forward to some snow to keep the dogs from tracking mud in the house! Should be a while before we have to worry about that again.

Snowbanks cover the yard

I hope everyone made it through the storm ok...and for my southern friends...enjoy your sprouting gardens and green grass...while we dig out from our second big blizzard of the winter!

Spring is just around the corner, spring is just around the corner, spring is just around the corner....

Spring is just around the corner

Faux Painting A Concrete Floor

  If you're looking for an inexpensive way to finish your basement floor, why not paint it? This is a project that we did a few years ago, and it has held up quite well, with just a few scratches. We've done a lot of painting projects, but we'd never painted a concrete floor before. We have, however, spilled enough latex paint on concrete to know it doesn't come off easily, so we knew latex paint would work well for this job. It's also the easiest to work with.


  We decided to start painting in a bedroom. I figured by the time I finished the bedrooms, bathroom and hallway, I should be a pro, and ready to take on the family room.

  We painted the floor with a base coat. We had a big pail of ivory paint left over from painting our walls upstairs, so we used that. We added some dark brown paint just to give it a little more colour. The nice thing about painting a floor is that you don't need a paint tray....Brian just sloshed some paint on the floor and I rolled it on...a little smaller slosh might have been better, as the paint in that area is pretty thick


 Just having the base coat on made such a difference, I could have just left it like that! You'll notice in this picture that the walls are just primed. We decided to do the floor first and then the walls...for a couple of reasons....one, I'm impatient, and wanted to get at the floors! And the other...I planned to do faux painting on the walls too, and figured it would be easier to wipe spatters off a painted floor than bare cement.


 Brian got the fun job of crawling around the floor marking off the squares. I taped the lines with 6mm paint tape...just wide enough to create the look of a grout line.


 I asked Brian to pick up three shades of brown paint. The original three colors were too close, so we took the middle one and added some ivory. This gave us the contrast we needed.


 I applied the paint to a large sponge with a paint brush, creating a pattern on the sponge.


Dabbing the sponge on the floor, I painted one square at a time. It's important to change the position of the sponge, giving a little turn here and there, to create variations in the pattern. Once I'd covered the entire square, I'd go back and dab more paint on to add more of a pattern, then moved on to the next square. By doing each square separately, the pattern is somewhat different; more like real tiles would be.


This is a short video showing how I used the brush and sponge.


Painting the floor took less than two hours...not bad, for a first try!


After about two more hours, the floor was dry enough for me to remove the tape. It came up very easily.


It turned out even better than I had hoped!


 Once the first bedroom was done, we did the hall closet, and then I started working my way from the bedroom door, down the hallway. 


  I also found a faster way to apply the paint. I dabbed it directly onto the floor with a paintbrush, then sponged it around, until the square was covered, overlapping the tape just a little. Either method works well, and the pattern looks the same.


I worked my way down the hall, until I came to the bathroom, and did that first.


Once the bathroom was done, I continued down the hallway toward the family room. The two other bedrooms were next.


This is the view from the stairway, looking toward the family room...the next stage of the project!


The family room, all prepped and painted, and Brian is marking the lines.


As I went along, I got brave and started to do a few squares at a time!


All done, and tape removed.


Three coats of Varathane clear coat over the entire floor gave it a nice finish!


  The entire project, 3 bedrooms, a bathroom, hallway, and family room, was spread out over about 6 weeks, with some walls painted during that time too. It was a huge job, but it was definitely worth the effort. It's such an easy to clean floor; just a damp mop is all that's needed.

  I've seen this same method used on a porch floor, but I think in an unheated area it might be better to not apply the clear coat over top. We tried painting a storage room in our garage, and the varathane seemed to lift the paint. In a warmer climate, this probably wouldn't be an issue so it would work fine on a porch floor or even a covered patio.

  I also did some faux painting on the bathroom walls, that I think turned out even better. You can see that post HERE.

Pathways I Have Known

  Maybe you are looking for ideas for a pathway through your yard or garden...or maybe, like me, you just love pathways. Whatever brought you here, I hope you enjoy taking a stroll through the garden, a hike through the forest, or just a walk in the park. Brick, stone, sand, or grass, wooden or strewn with leaves....I love pathways!


A split log and rock pathway through the flower garden

 Some of my favorite pathways are from Mom and Dad's old place. 
Doesn't this old brick pathway just invite you to 
walk down the hill to the garden?

Old brick pathway through flowers

And once you get to the garden....
you can't help but follow the maze of lush green pathways.

Grassy pathways through flower beds

Grassy pathways through flower beds

Once you make your way back up the hill, 
you'll find more pathways at the front of the house.

Grassy path through flower beds

You can take the paving stone pathway 
leading through more flower beds to the driveway,

Brick pathway through flower beds

or if you prefer, 
this stepping stone pathway leads around the other side of the house 
where you can enjoy sitting on the shaded deck.

Stepping Stones pathway

This pathway in our old yard, is a mix of rocks and split logs.
There's also a little stream to step across, hidden in the flowers.

Rocks and split log pathway through flowers

This leaf strewn pathway meandered through the trees in the same yard.


Leaf Strewn path through trees


This well worn path was created by a motor bike and ATV...
but it sure looks pretty surrounded by all those dandelions!

Trail through dandelions

No pathway lover can resist a boardwalk!
This one is located in Sprucewoods Park.

Boardwalk Sprucewoods Park Hiking trail

I like them so much, we made one in our own back yard!
Not quite the same, but I like the way it turned out.

Boradwalk

Wood chips, make a nice covering for pathways. 
We had such a good time walking these ones 
through the English Garden in the Assiniboine Park.

English Garden Assiniboine Park

English Garden Assiniboine Park

These brick pathways led us through the Butterfly Gardens, 
located in the Assiniboine Park Zoo.


Butterfly Gardens

Then there are pathways that I love for sentimental reasons.
This sandy road leads up the big hill at Jackson's Lake.

Jackson's Lake

And this trail leads back down to the lake.

Jackson's Lake

It's been a few years since we've been hiking
but I love these trails at Spruce Woods Park.

Sprucewoods hiking trails

There's an amazing view from the top of this trail.

Sprucewoods Park hiking trails

And closer to home...
our trails through the Spruce Woods Wildlife Refuge.


Spruce Woods Wildlife Refuge


And these ATV trails along the edge of the forest.


ATV trails, Sprucewoods


  What is your favorite pathway? Stepping stones across a stream, a meandering garden path, or do you prefer the path less travelled? Life is full of pathways....choosing the right one makes all the difference.